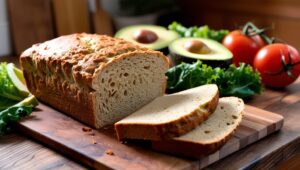
Keto Sourdough Bread recipe
Imagine sinking your teeth into a slice of warm, crusty bread with that distinctive sourdough tang, only to realize it’s completely keto-friendly. Sounds too good to be true? Not anymore! This Keto Sourdough Bread recipe is here to revolutionize your low-carb lifestyle. Say goodbye to bread cravings and hello to a delicious, guilt-free indulgence that will make you forget you’re on a ketogenic diet.
Ingredients
For the starter (to be prepared 24 hours in advance):
– 1/2 cup almond flour
– 1/4 cup warm water
– 1 tsp active dry yeast
For the bread:
– 2 cups almond flour
– 1/2 cup coconut flour
– 1/4 cup ground psyllium husk
– 2 tbsp ground flaxseed
– 1 tsp baking powder
– 1 tsp salt
– 1/4 tsp xanthan gum
– 4 large eggs, room temperature
– 1/4 cup apple cider vinegar
– 1/4 cup warm water
– 2 tbsp olive oil
– 1 tbsp erythritol (optional, for a slight sweetness)
Tools Required
– Large mixing bowl
– Medium bowl (for the starter)
– Measuring cups and spoons
– Whisk
– Wooden spoon or silicone spatula
– Dutch oven or heavy-bottomed oven-safe pot with lid
– Parchment paper
– Kitchen scale (optional, but recommended for precise measurements)
– Thermometer (to check water temperature)
– Sharp knife or bread lame (for scoring)
– Cooling rack
Keto Sourdough Bread Preparation Method
Step 1: Prepare the Starter (24 hours in advance)
1. In a medium bowl, combine 1/2 cup almond flour, 1/4 cup warm water (around 100°F/38°C), and 1 tsp active dry yeast.
2. Mix well until no dry spots remain.
3. Cover the bowl with a clean kitchen towel or plastic wrap.
4. Let it sit at room temperature (around 70°F/21°C) for 24 hours.
This step is crucial for developing the characteristic sourdough flavor. The combination of almond flour and yeast creates a unique environment where beneficial bacteria can thrive, producing lactic and acetic acids. These acids are responsible for the tangy taste we associate with sourdough. The warm water activates the yeast, kickstarting the fermentation process. As the mixture sits, it will become bubbly and develop a slightly sour smell, indicating that the starter is active and ready to use.
Step 2: Prepare the Dough
1. In a large mixing bowl, whisk together the dry ingredients: 2 cups almond flour, 1/2 cup coconut flour, 1/4 cup ground psyllium husk, 2 tbsp ground flaxseed, 1 tsp baking powder, 1 tsp salt, and 1/4 tsp xanthan gum.
2. In a separate bowl, beat the 4 eggs until well combined.
3. Add the prepared starter, beaten eggs, 1/4 cup apple cider vinegar, 1/4 cup warm water, 2 tbsp olive oil, and 1 tbsp erythritol (if using) to the dry ingredients.
4. Mix thoroughly with a wooden spoon or silicone spatula until a sticky dough forms. The dough will be wetter than traditional wheat-based bread dough.
This step combines the flavor-packed starter with additional ingredients to create a keto-friendly dough. The almond and coconut flours provide a low-carb base, while the psyllium husk and flaxseed add fiber and help bind the ingredients. Xanthan gum acts as a gluten substitute, providing structure to the bread. The eggs serve as a binding agent and add moisture, while the apple cider vinegar enhances the sourdough flavor and helps activate the baking powder. The warm water and olive oil contribute to the bread’s texture and moisture content.
Step 3: First Rise
1. Cover the bowl with a damp kitchen towel or plastic wrap.
2. Let the dough rise in a warm, draft-free place for 4-6 hours. The dough should increase in size, though it won’t double like traditional wheat-based dough.
During this extended rise, the yeast continues to ferment the dough, producing carbon dioxide gas that gets trapped within the dough structure. This process not only helps the bread rise but also further develops the complex flavors characteristic of sourdough. The longer rise time compensates for the absence of gluten, allowing the keto-friendly flours to absorb moisture and the psyllium husk to form a more stable structure.
Step 4: Shape and Second Rise

1. After the first rise, gently turn the dough out onto a piece of parchment paper.
2. With wet hands, shape the dough into a round loaf.
3. Using a sharp knife or bread lame, score the top of the loaf with a crosshatch pattern or your preferred design. This allows for controlled expansion during baking.
4. Place the shaped loaf (still on the parchment paper) into a bowl similar in size to your Dutch oven.
5. Cover and let rise for another 30-60 minutes.
Shaping the dough helps create surface tension, which contributes to a better rise and crust formation. The scoring serves both aesthetic and functional purposes – it guides the expansion of the bread as it bakes, preventing unpredictable cracks and ensuring an even rise. The second rise allows the dough to relax and slightly expand before baking, contributing to a lighter texture in the final loaf.
Step 5: Preheat and Prepare for Baking
1. While the dough is on its second rise, place your Dutch oven or heavy-bottomed pot (with lid) in the oven.
2. Preheat the oven to 425°F (220°C) with the pot inside. This usually takes about 30 minutes.
Preheating the Dutch oven creates an initial burst of heat and steam when the dough is introduced, mimicking the environment of a professional bread oven. This high heat helps create a crispy crust and promotes optimal rise during the first few minutes of baking.
Step 6: Bake
1. Carefully remove the hot Dutch oven from the oven.
2. Lift the parchment paper with the dough and gently lower it into the hot Dutch oven.
3. Cover with the lid and bake for 30 minutes.
4. After 30 minutes, remove the lid and bake for an additional 10-15 minutes, or until the top is golden brown and the bread sounds hollow when tapped on the bottom.
The initial covered bake traps steam from the bread itself, creating a moist environment that allows for maximum rise and prevents the crust from setting too quickly. Removing the lid for the final bake allows the crust to brown and crisp up, developing complex flavors through the Maillard reaction.
Step 7: Cool and Serve
1. Carefully remove the bread from the Dutch oven using the parchment paper.
2. Place on a cooling rack and let it cool completely before slicing (at least 2 hours).
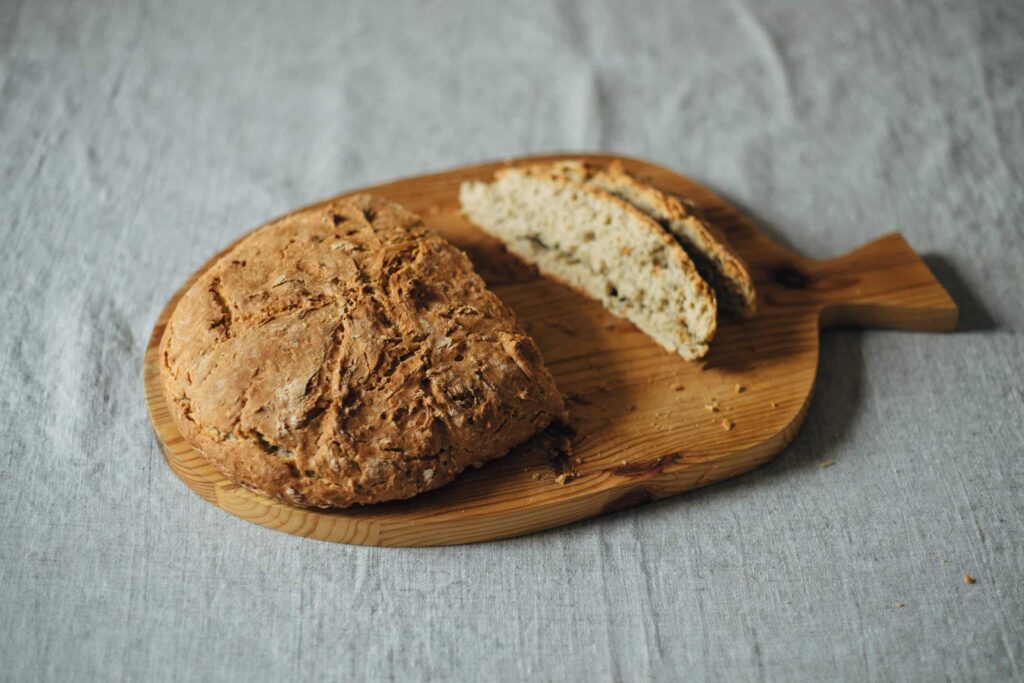
3. Once cooled, slice and enjoy your keto sourdough bread!
Allowing the bread to cool completely is crucial. During this time, the crumb structure sets and excess moisture evaporates, preventing a gummy texture. Patience here results in a better texture and easier slicing.
Try more amazing keto recipes.
Nutritional Information

Per slice (assuming 12 slices per loaf):
– Calories: 180
– Total Fat: 15g
– Saturated Fat: 2g
– Cholesterol: 62mg
– Sodium: 220mg
– Total Carbohydrates: 6g
– Dietary Fiber: 4g
– Net Carbs: 2g
– Protein: 8g
Please note that these values are approximate and may vary slightly based on specific brands of ingredients used.
Get Your Free keto bread cookbook
Notes and Tips
1. Starter Consistency: The starter should have a thick, paste-like consistency. If it’s too dry, add a little more water; if too wet, add a bit more almond flour.
2. Dough Texture: Keto bread dough is typically wetter and stickier than traditional bread dough. Don’t be tempted to add more flour – this is normal and necessary for a good final texture.
3. Room Temperature Ingredients: Using room temperature eggs and warm water helps the dough rise more effectively.
4. Measuring Flour: For best results, measure your flours by weight rather than volume. If using cups, lightly spoon the flour into the measuring cup and level off with a knife, don’t pack it down.
5. Xanthan Gum: This ingredient is crucial for texture. Don’t skip it, as it helps mimic the elasticity usually provided by gluten.
6. Flavor Variations: Feel free to add herbs like rosemary or thyme, or seeds like sunflower or pumpkin to the dough for extra flavor and texture.
7. Storage: This bread is best consumed within 2-3 days. Store in an airtight container at room temperature or slice and freeze for longer storage.
8. Toasting: This bread toasts beautifully and makes an excellent base for avocado toast or as a side for keto-friendly soups and stews.
9. Patience is Key: Both in the rising and cooling processes, patience will reward you with the best texture and flavor.
10. Experiment: Every kitchen is different. Don’t be afraid to adjust rising times or oven temperature slightly to suit your environment and equipment.
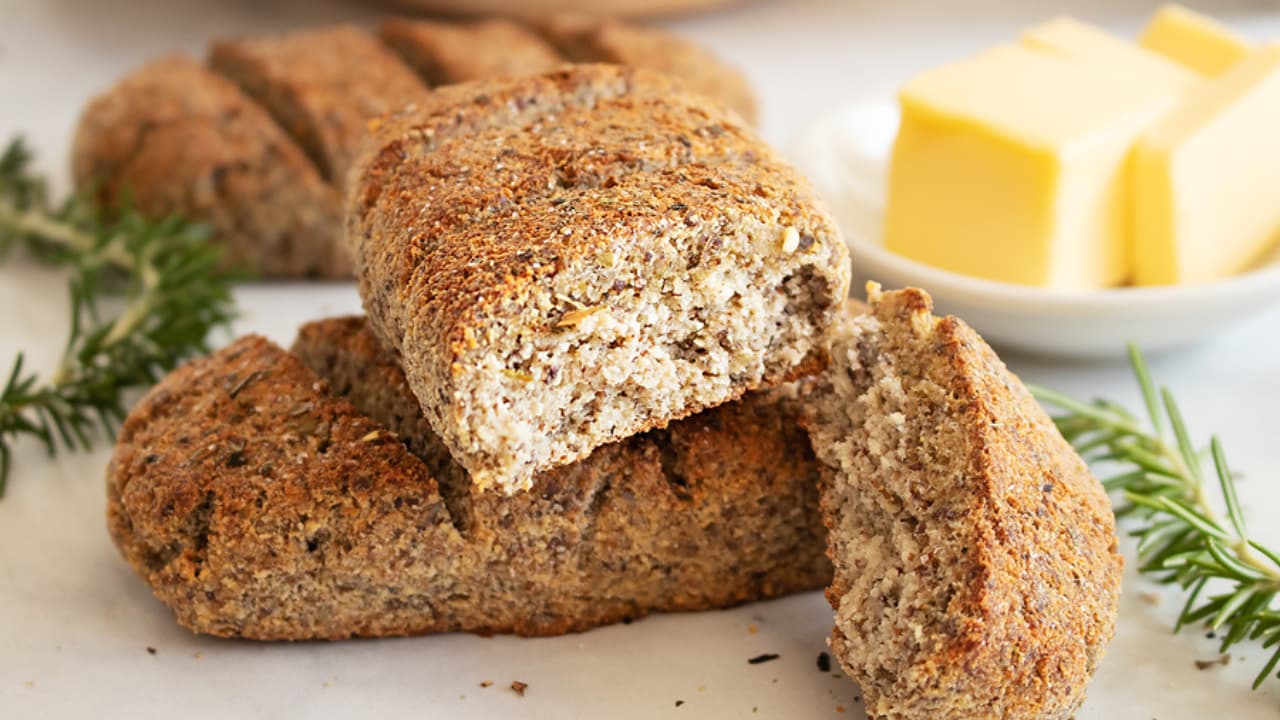
This Keto Sourdough Bread recipe brings the joy of artisanal bread back to those following a ketogenic lifestyle. With its crusty exterior, soft interior, and that unmistakable sourdough tang, it’s sure to become a staple in your low-carb kitchen. Happy baking!
Follow me on Facebook for more amazing keto recipes (Yay it’s keto)